✂️ How to Make a Double-Sided Keytag / Bag Tag with Your Embroidery Machine – Tutorial
If you’re looking for a fun, practical, and fast embroidery project, creating your own double-sided keytag or bag tag is the perfect pick! Whether you want to personalize backpacks, gift items, or add unique tags to your small business packaging – this tutorial is easy to follow and beginner-friendly. Let’s dive in!
🧵 Supplies You’ll Need:
-
1 piece of stabilizer (tearaway or cutaway)
-
1 piece of wash-away or heat-away film
-
Fabric (vinyl, felt, cotton – your choice!)
-
Standard bobbin thread and a bobbin with thread matching the top thread
-
Duct tape (for securing the folded tag)
-
Scissors or snips
-
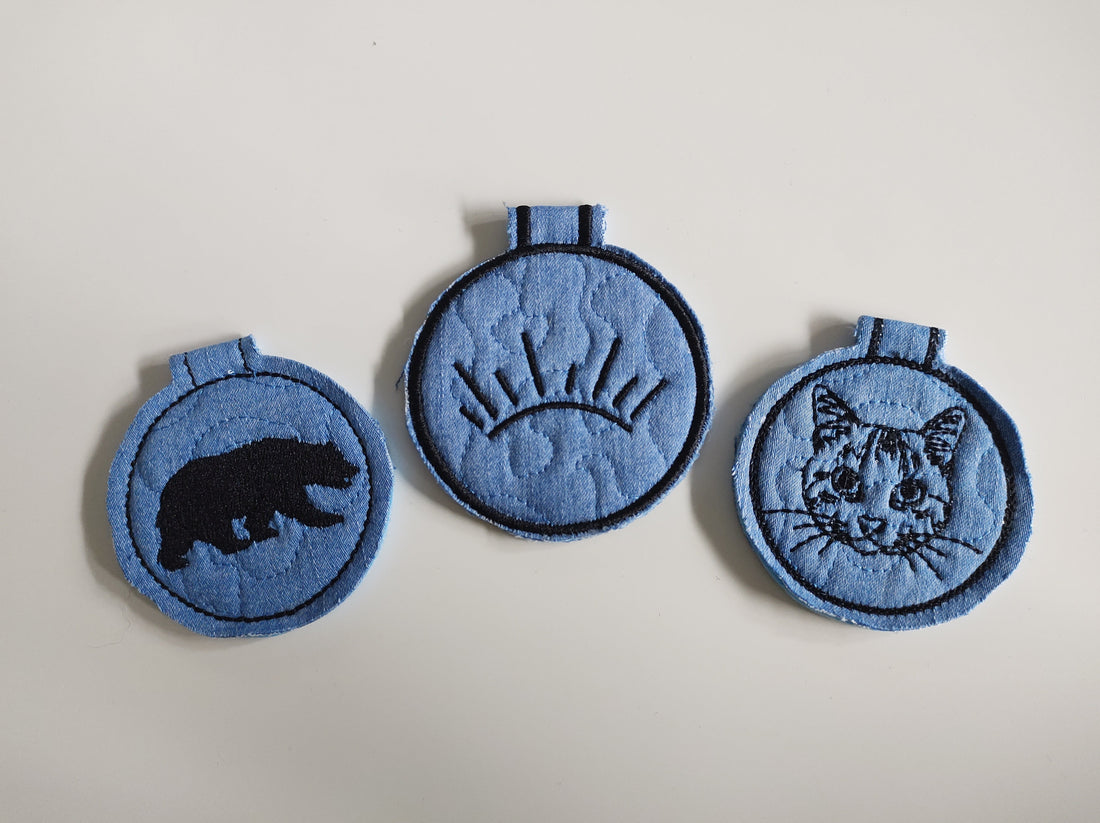
Round tag shapes A and B (provided in your purchase/download)
-
Two separate embroidery designs – either created on your computer or selected from your machine
-
(Optional) Fusible webbing for extra hold

🔄 Overview of the Process
This design is stitched in two separate hoops. First, you'll create the front and back of the tag (unfolded). Then, you'll join both sides by hooping a second time with the folded shape.
Step-by-Step Tutorial
✅ Step 1: Hoop the Stabilizer
Start by hooping your tearaway or cutaway stabilizer. Make sure the hoop is large enough to stitch both sides of the tag – one on top, one on the bottom.
✅ Step 2: Stitch Placement Lines
Run the placement stitch to show where your fabrics will go.

✅ Step 3: Add Front Fabric & Complete Designs
Lay the front fabric over the first placement stitch and run the next step to secure it. Continue with the machine embroidery program to stitch both front and back tag outlines and any additional designs.
✂️ Step 4: Remove and Trim
Remove the hoop from the machine. Cut very close to the outline stitch on both front and back pieces.
Fold the tag in half along the center line and use duct tape to hold both sides in perfect alignment. Precision is key for a clean final look.


💧 Step 5: Hoop Water-Soluble or Heat-Away Film
Next, hoop only the wash-away or heat-away film. Attach the hoop to your machine.
Don’t forget to change the bobbin to match the top thread color — this ensures clean, reversible stitching.
Upload the “B” version of the design to your machine.
✅ Step 6: Stitch the Placement Line
Stitch the placement guide again. Then, place your folded tag onto the placement outline, aligning it carefully.
Secure it with duct tape to avoid shifting.

✅ Step 7: Complete the Embroidery
Start the program to stitch around the folded tag, completing the design and sealing the front and back together.
Once finished:
-
Remove the hoop
-
Trim excess stabilizer
-
Snip jump stitches
-
Cut cleanly around the decorative border
If you used wash-away stabilizer, soak the tag to dissolve any residue.

🧼 Optional Finishing Touch
You can apply seam sealer along the stitched edges for durability, especially if the tag will be frequently handled.
💬 Need Help?
We’re always here for you! If you have questions, reach out via Etsy Messenger or email us at paula@kraftygraphy.com.
📌 Great Uses for These Tags:
-
Kids’ backpack ID tags
-
Gift bag accessories
-
Product labels for handmade goods
-
Pet tags
-
Keychains
-
Event favors or promotional tags
Ready to create your own?
Grab your Double-Sided Round Tag Embroidery Design and let’s get stitching!